
Recessed Scissor Lift Installation: What to Plan Before Concreting the Floor
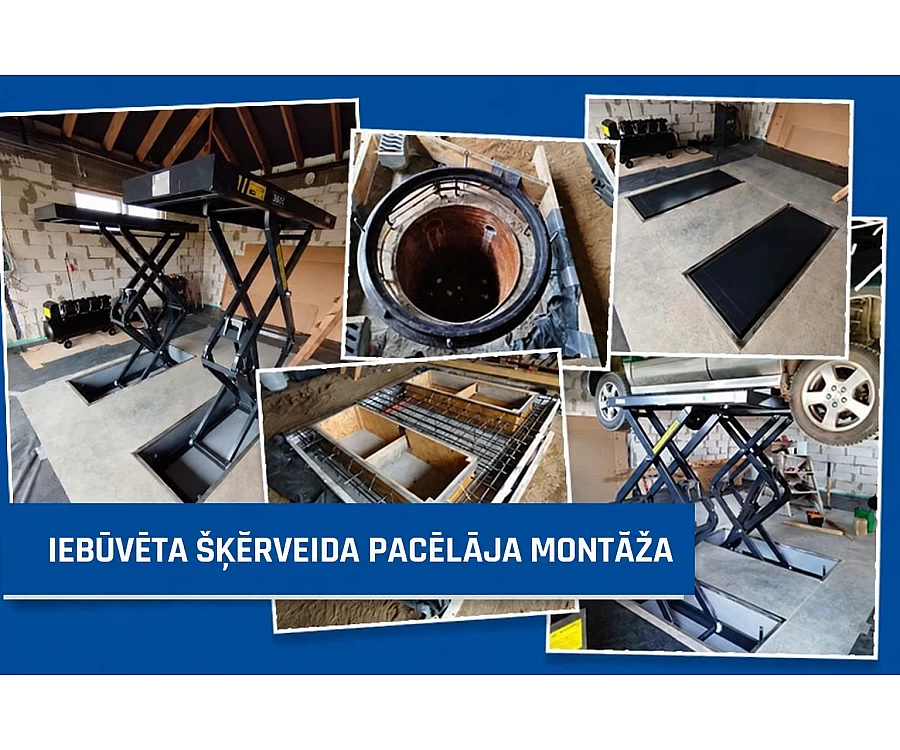
Installing a recessed scissor lift does not begin with installing the lift itself. It starts with proper planning of the work area and preparation of the floor.
Before concreting, it is important to plan the dimensions and depth of the installation pits, the concrete base structure, the location of the power supply and other utilities, liquid collection and protection of the pit edges.
In this article, we look at a real installation project involving the BD-S4 recessed double scissor lift - from planning the work area and preparing the pits to concreting, installing the lift and carrying out the final checks.
It is important to consider not only the requirements shown in the installation drawing, but also practical solutions that need to be planned before construction work begins. Some of the most important preparation details are no longer visible once the work is complete, but they can have a significant impact on the future operation of the lift.
What is a recessed scissor lift?
A recessed scissor lift is installed in specially prepared pits in the floor.
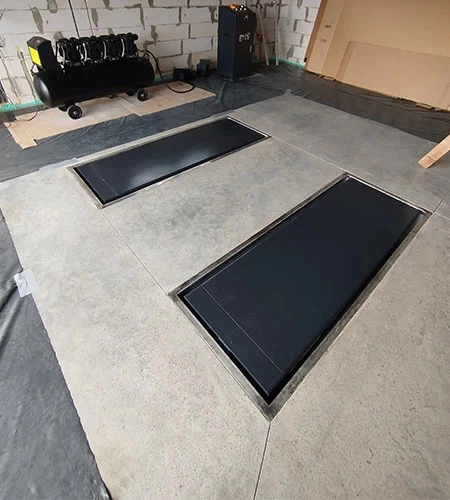
When the lift is fully lowered, its platforms and lifting mechanisms are integrated into the floor structure, so no raised floor-mounted structure remains in the work area.
This solution is particularly useful in automotive workshops where efficient use of the work area is important.
However, installing a recessed lift requires considerably more preparation than installing a lift on an existing finished floor.
The main principle is simple: the location and installation requirements of a recessed lift should be planned before the floor is constructed.
The BD-S4 scissor lift installed in this project
The lift installed in this project was the BD-S4 recessed double scissor lift.
It is intended for passenger vehicle maintenance, suspension repair and inspection work.
Main BD-S4 specifications:
| Parameter | BD-S4 |
|---|---|
| Lifting capacity | 3500 kg |
| Maximum lifting height | 2030 mm |
| Platform length | 1640-2040 mm |
| Platform width | 550 mm |
| Recess depth | approximately 330 mm |
| Concrete base thickness beneath the lift area | more than 200 mm |
| Power supply | 230 V or 400 V |
| Lifting system | electro-hydraulic |
The BD-S4 is equipped with hydraulic cylinder synchronisation, a double mechanical safety system, protective hydraulic valves, a mechanical emergency lowering function and a separate control unit with a 24 V control circuit.
Important: these specifications apply to the BD-S4. Installation dimensions and technical requirements may differ for other scissor lift models.
Recessed scissor lift installation: 9 key stages
1. Planning the lift location and work area
The first task is not building the pits. First, you need to determine exactly where the vehicle and the lift itself will be positioned in the premises.
You need to assess not only the external dimensions of the lift, but the entire planned work area.
- the direction of vehicle entry
- distance from walls
- distance from doors or gates
- space for other workshop equipment
- the technician's movement area
- the height of the raised vehicle
- structures above the vehicle
In practice, it is advisable to leave more free space in front of the vehicle than behind it, because work is often carried out in the engine compartment and additional space is required for the technician and equipment.
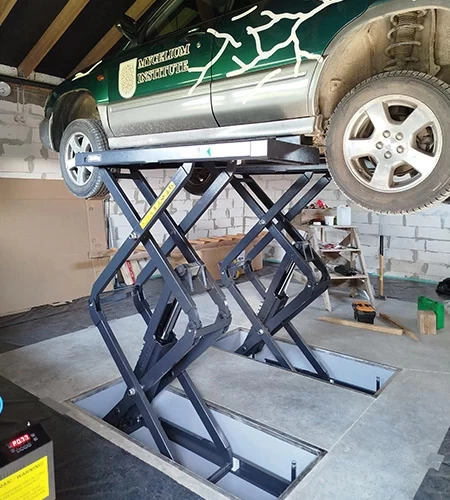
Do not forget the room height
You should check not only the lifting height of the lift itself, but also the height of the vehicle on the lift and any structures above it.
- the ceiling
- gate tracks
- gate drive mechanisms
- beams
- lighting
- ventilation ducts
- other equipment
The maximum lifting height of the BD-S4 is 2030 mm, so this check should be carried out before the final location of the pits is determined.
Once the floor has been concreted, changing the position of the lift may require substantial reconstruction work.
2. Determining the pit dimensions and position
Once the lift position has been determined, the dimensions and location of the installation pits can be planned.
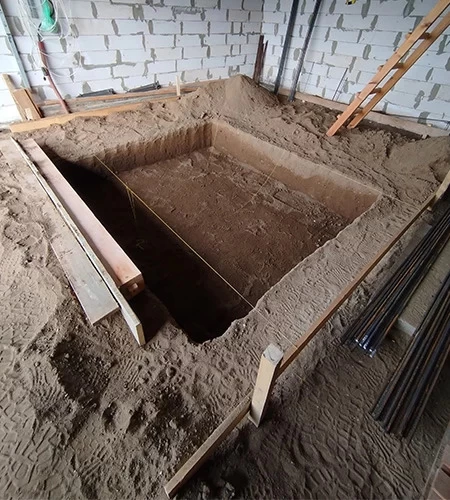
According to the BD-S4 installation diagram, two separate pits are formed for the two lifting mechanisms.
The specified recess depth is approximately 330 mm, and a suitable concrete base must be prepared beneath the lift area.
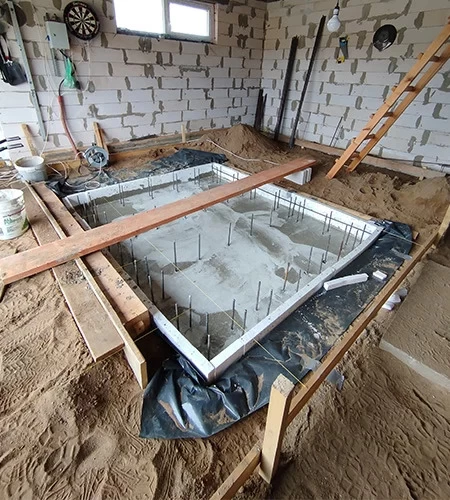
Accuracy is especially important at this stage.
- pit length
- pit width
- pit depth
- distance between the pits
- diagonal measurements
- the planned finished floor level
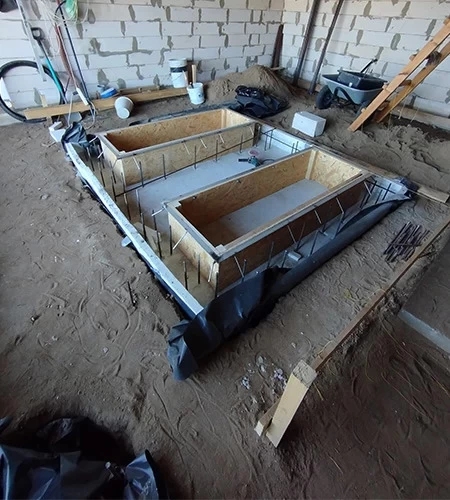
Incorrectly formed pits can later make it more difficult to install the lift structure, centre the platforms or align their height with the finished floor surface.
3. Liquid drainage and collection
Liquid drainage from the lift pits should be planned before concreting.
This is one of the most important practical aspects that had to be considered in this project before the floor was concreted.
A practical solution is to route liquid from the lift pits to a dedicated collection sump or tank.
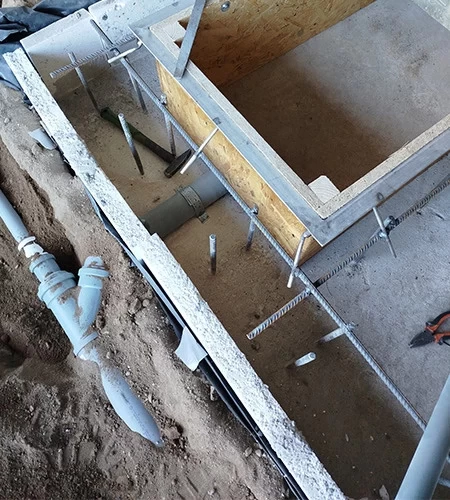
Why is this important?
- snow
- ice
- water
- dirt
- road salt
As the vehicle warms up, snow and ice melt and water from the underside of the vehicle reaches the workshop floor.
Recessed lift pits are among the lowest points in the work area. If liquid collection is not properly planned, moisture and dirt can accumulate inside them.
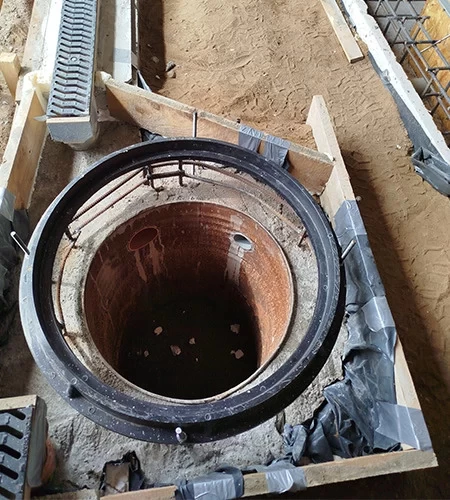
There is also a risk of engine oil, fuel, hydraulic fluid and other technical fluids being spilled in an automotive workshop.
For this reason, liquid accumulating in the pits should be collected in a controlled manner rather than being automatically discharged directly into the general wastewater system.
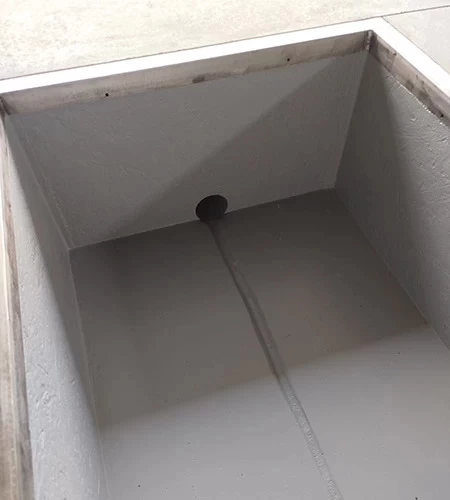
A separate collection sump or tank makes it possible to monitor what liquids have entered it. Once it is full, the contents can be assessed and suitable pumping and disposal can be arranged if necessary.
Important: the specific solution for collecting and disposing of wastewater and technical fluids should be selected according to the intended use of the site, local engineering systems and applicable environmental requirements.
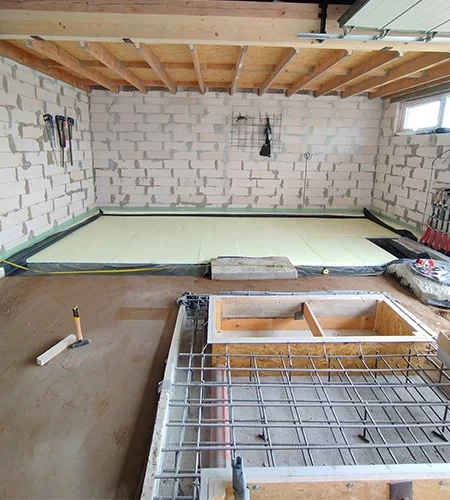
4. Formwork and formation of the pits
Once the base and utilities have been prepared, the lift pits are formed.
In this project, OSB and other structural elements were used to create two precise recesses.
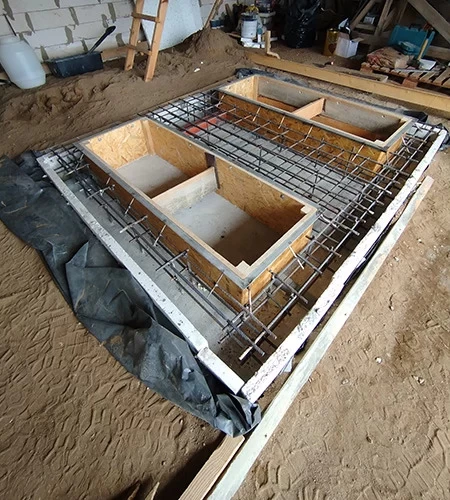
The lift mechanisms were later installed in these pits.
At this stage, the final geometry of the lift installation area is established.
It is particularly important to set the upper level of the pits accurately, because this determines how the fully lowered lift will align with the surrounding finished floor level.
5. Protecting the pit edges
During construction, it is also worth providing a metal angle frame to protect the edges of the pits.
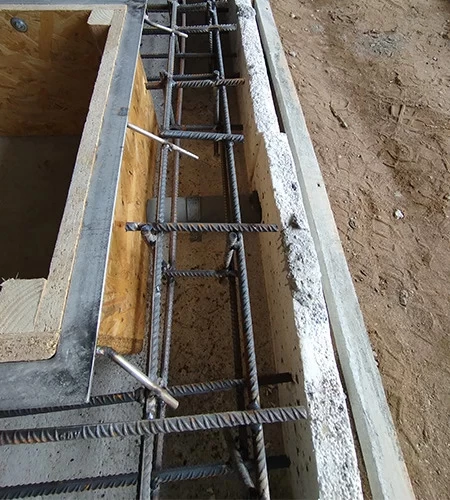
Without this protection, the concrete corners are more susceptible to mechanical damage.
During lift installation, maintenance or everyday work, tools, equipment or other objects may strike the pit edges.
Over time, an unprotected concrete edge may begin to crumble.
Stainless steel is recommended for this purpose.
In an automotive workshop environment, metal is regularly exposed to moisture and, in winter, to road salt brought indoors by vehicles. Corrosion-resistant edge protection is therefore a more practical long-term solution.
6. Reinforcement and concrete base construction
Once the pits have been formed, the reinforcement for the base and floor is prepared.
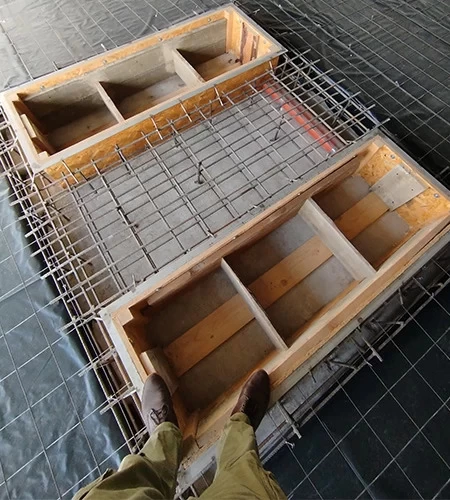
The base structure is particularly important in the lift installation area because substantial loads are transferred to the floor during operation.
The concrete base solution should not be selected solely "from experience".
It must meet the installation requirements of the specific lift and the structural conditions of the site.
The BD-S4 installation diagram states that the concrete base thickness beneath the lift area must be more than 200 mm.
Before concreting, all required utility connections to the lift and control unit should also be fully planned.
Changing underfloor solutions after the floor has been constructed will be considerably more difficult.
7. Concreting the floor
Once the pits, reinforcement and utilities have been prepared, the remaining floor structure can be concreted.
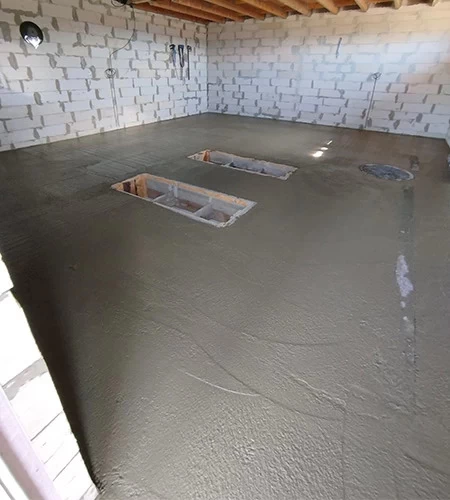
At this stage, the accuracy of the measurements taken earlier becomes especially important.
The height of the concrete surface must be aligned with the upper edge of the pits and the planned position of the lift platforms.
The goal is for the fully lowered platforms to integrate as accurately as possible into the finished floor surface.
This is one of the main advantages of a recessed scissor lift.
When the lift is fully lowered, its structure protrudes less above the work area floor than a floor-mounted model.
8. Preparing the pits before installing the lift
Once the concrete has reached the required properties, the pits are given their final preparation before the lift is installed.
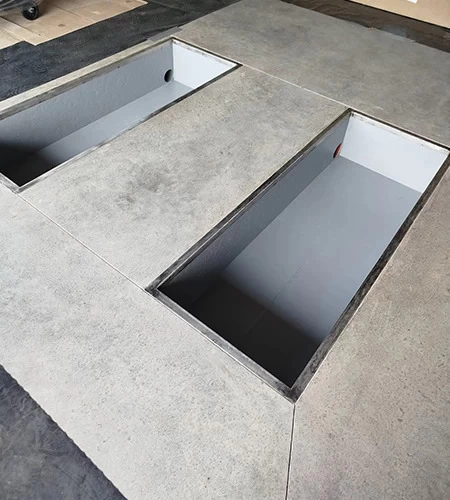
- the inside of the pits was covered with a protective coating
- the edges were finished
- the utility openings were checked
- the water drainage was checked again
This is the right time to make any final corrections.
Once the lift has been installed, access to some pit surfaces and utilities becomes considerably more difficult.
Any necessary corrections should therefore be completed before the equipment is installed.
9. Lift installation and commissioning
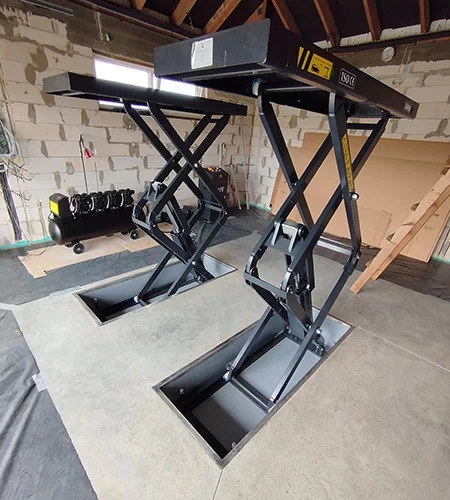
Only after all construction and preparation work has been completed are the two BD-S4 lifting mechanisms installed in the pits.
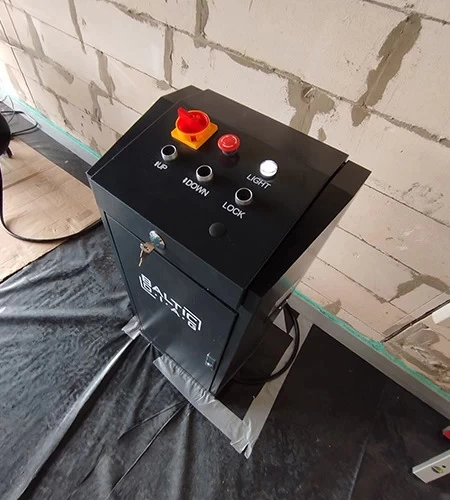
The control unit is positioned separately, after which the hydraulic and electrical systems are connected.
The BD-S4 is equipped with hydraulic cylinder synchronisation, a double mechanical safety system, protective hydraulic valves, a mechanical emergency lowering function and electronic and hydraulic components integrated into the control unit.
After installation, the lift is adjusted and its operation is checked.
- movement of both platforms
- platform synchronisation
- operation of the safety locks
- height in the fully lowered position
- platform position relative to the floor
Only after these checks have been completed can the lift be tested under real working conditions with a vehicle.
.webp)
Recessed or above-ground scissor lift?
| Recessed scissor lift | Above-ground scissor lift |
|---|---|
| Integrated into the floor structure | Installed on the floor |
| Causes less obstruction in the work area when lowered | No installation pits are required |
| The floor must be prepared in advance | Simpler installation process |
| Utilities must be planned in advance | Less construction work required |
| Especially suitable for a new or renovated automotive workshop | May be more convenient in an already finished facility |
If an automotive workshop is being built or renovated, it is advisable to select the recessed lift before floor construction and concreting begin.
This allows the technical requirements of the lift to be incorporated into the premises and floor design at the planning stage.
BalticDiag offers a range of scissor lifts for different workshop applications and installation types.
What should be checked before concreting the floor?
- the exact lift position has been planned
- the direction of vehicle entry has been checked
- distances from walls, doors, gates and other equipment have been assessed
- the room height has been checked
- the height of the raised vehicle has been assessed
- structures above the vehicle have been checked
- pit dimensions and depth have been planned
- the distance between the pits and diagonal measurements have been checked
- the concrete base structure has been planned
- the power supply and other utilities have been planned
- a liquid collection system has been planned
- pit edge protection has been planned
- the final floor level has been checked
The most important thing is to make these decisions before concreting.
Changing these solutions later may require additional construction work.
Common mistakes before concreting
The lift is selected only after the floor has been constructed
The finished floor structure may not meet the installation requirements of the selected lift model.
Pit dimensions are estimated
Pit dimensions, spacing and depth should be determined from the installation documentation for the specific lift.
The total height of the raised vehicle is not checked
You need to consider not only the lift itself, but also the vehicle and all structures above it.
Utilities are planned too late
After concreting, installing the power supply, hydraulic connections and other utilities may require additional floor reconstruction.
No liquid collection solution is planned
Water, road salt, dirt and technical fluids can enter the lift pits.
The final floor level is not accurately aligned with the lift
This can make it difficult to integrate the platforms precisely into the finished floor surface.
4 practical tips for installing a recessed scissor lift
1. Plan liquid drainage from the pits in advance
In winter, melting snow, water, dirt and road salt can enter the pits. A liquid collection solution is much easier to install during construction than after the lift has been installed.
2. Collect liquids in a controlled manner
It is advisable to provide a separate collection sump or tank rather than automatically connecting the pits directly to the general wastewater system. This makes it possible to monitor the accumulated liquid and assess its condition before disposal.
3. Protect the concrete pit edges
A metal angle frame helps protect the concrete edges from mechanical damage. Stainless steel is a practical choice, especially in an automotive workshop environment where the structure is exposed to moisture and road salt.
4. Consider not only the lift dimensions, but also the vehicle dimensions
Check the room height, gate structures, beams and other elements above the vehicle. Plan the lift location so that enough working space remains in front of the vehicle.
Key lessons from the BD-S4 installation project
The final result is a double scissor lift fully integrated into the floor.
The lowered platforms sit inside the pits, while in the raised position the lift provides unobstructed access to the vehicle's suspension, underbody and other components being serviced.
However, when looking only at the finished result, much of the work that has been completed is no longer visible.
- the concrete base
- reinforcement
- utilities
- liquid collection solutions
- protected pit edges
- precisely formed pits
- the complete lift installation structure
This is why installing a recessed scissor lift should begin not with the lift itself, but with proper planning of the work area and floor structure.
Frequently asked questions
How deep does the pit need to be for the BD-S4 lift?
According to the BD-S4 installation diagram, a recess depth of approximately 330 mm is specified. Exact installation dimensions should always be checked against the installation documentation for the specific lift.
How thick should the concrete base be?
The BD-S4 installation diagram states that the concrete base thickness beneath the lift area must be more than 200 mm.
Should liquid collection be planned for a recessed lift?
In practice, a liquid collection solution should be planned in advance because melting snow, water, dirt, road salt and technical fluids can enter the pits.
Can a recessed scissor lift be installed in an existing automotive workshop?
This depends on the existing floor structure, the installation requirements of the specific lift and whether the necessary construction work can be carried out. The specific solution should therefore be assessed before renovation begins.
When is the best time to select the lift - before or after the floor is constructed?
If a recessed lift is planned, it is best to select it before the concrete floor is constructed. This allows the pit dimensions, base, utilities, power supply and other technical solutions to be coordinated in advance.
Contact BalticDiag
If you are planning a new automotive workshop, renovating an existing work area or installing a new vehicle lift, contact BalticDiag. We can help you choose suitable equipment and discuss the key technical requirements for its installation in advance.